Tiếng Việt
 日本語
日本語 한국어
한국어
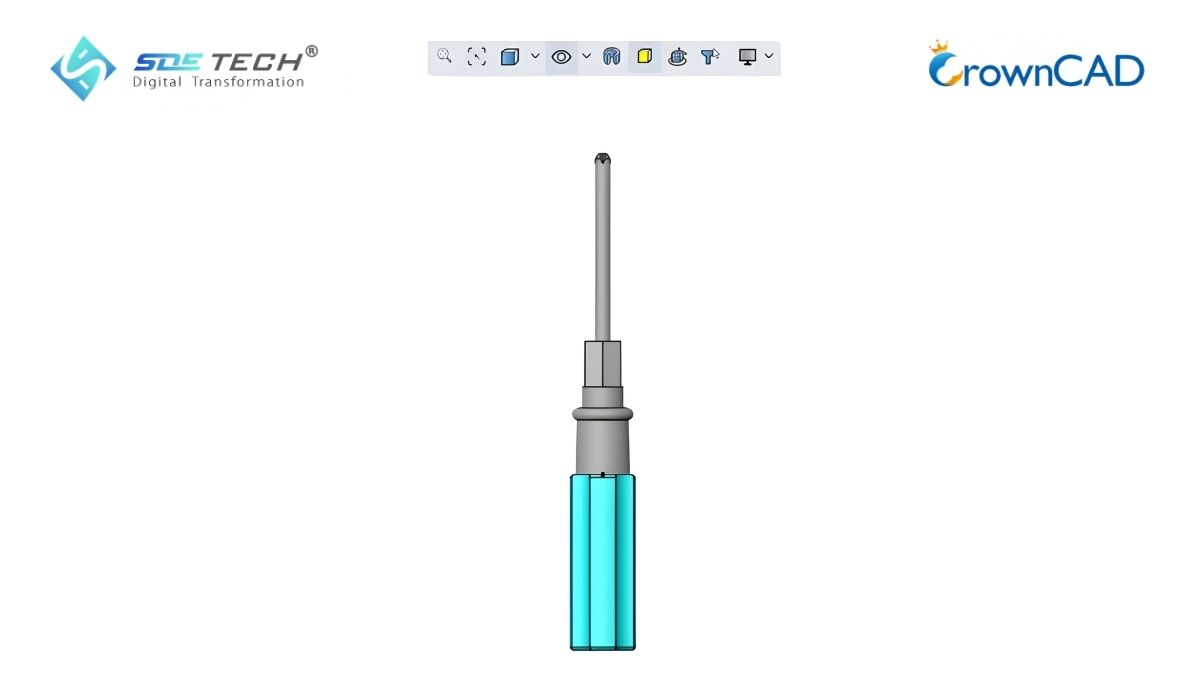
A Phillips screwdriver is one of the essential tools in every mechanical toolkit. But have you ever thought about designing your own screwdriver? This article will guide you through 3D screwdriver design in a simple and intuitive way using CrownCAD. Let SDE Tech walk you through the design process from basic to completion below!
1. Preparation before designing
Before getting started, you need to:
- Familiarize yourself with the CrownCAD interface
- Determine the basic dimensions of the Phillips screwdriver
- Prepare a design concept (handle, shaft, screwdriver tip)
Maintaining the correct coordinate system (plane and origin) throughout the process will help you avoid errors in later steps.
2. Detailed 3D screwdriver design process (17 steps)
The 17-step workflow for designing a 3D screwdriver using CrownCAD:
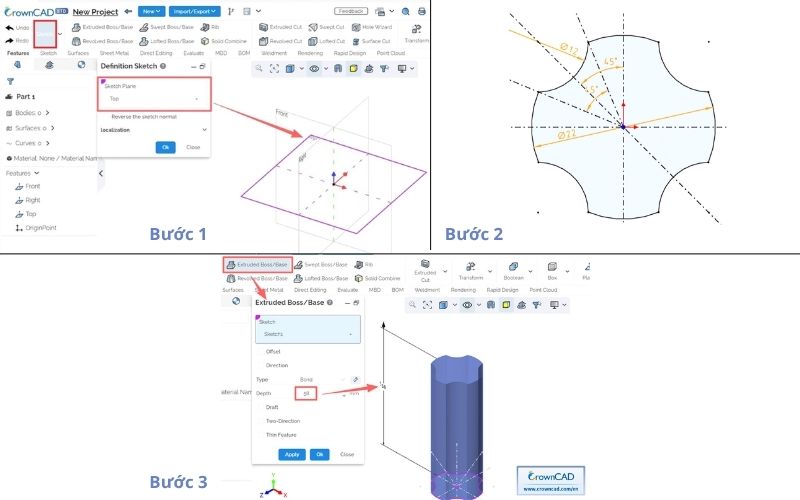
2.1 Create the basic screwdriver body
Step 1: Create a new part → select Sketch on the Top plane
Step 2: Draw the sketch with dimensions and angular constraints → exit sketch
Step 3: Extrude (Extruded Boss/Base) with a depth of 58 mm
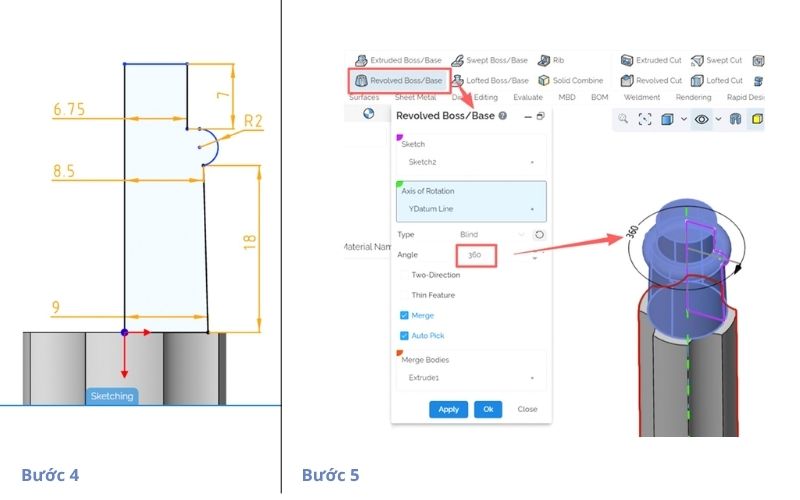
2.2 Create the 3D screwdriver handle
Step 4: Create a sketch on the Front plane
Step 5: Revolve (Revolved Boss/Base) using the YDatum axis
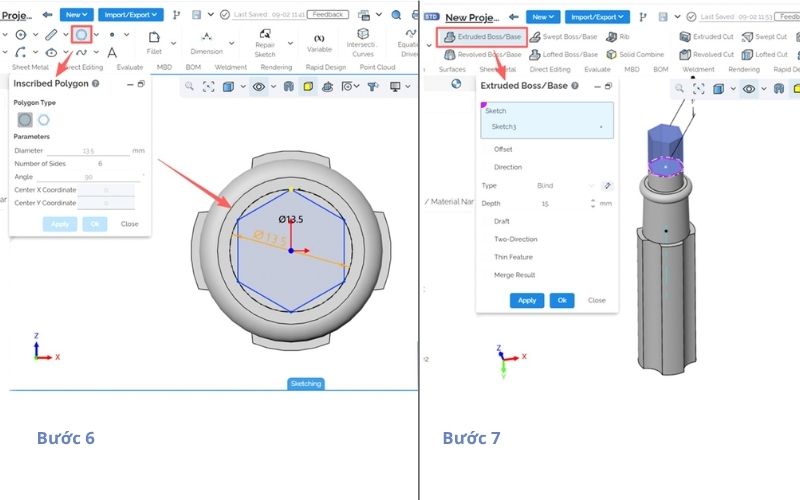
2.3 Create polygon shape and shaft
Step 6: Sketch on Top → create an inscribed polygon
Step 7: Extrude the polygon to the desired depth
2.4 Create shaft tip details
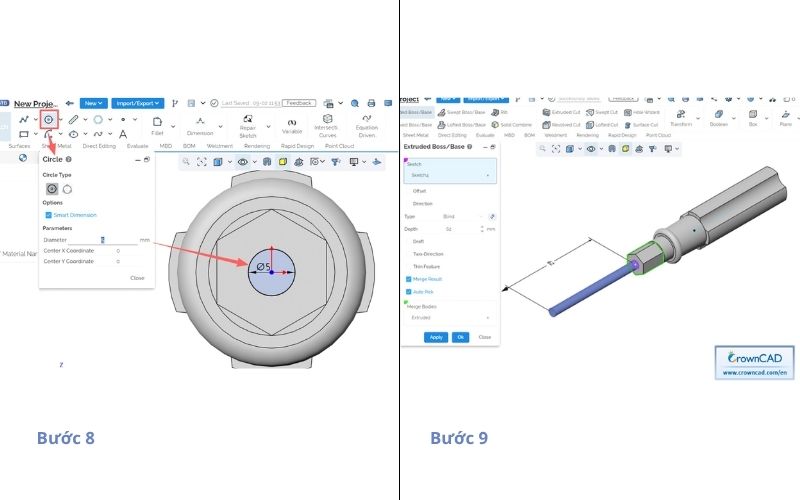
Step 8: Draw a Φ5 circle at the center of the top face
Step 9: Extrude the circular section
2.5 Refine geometry
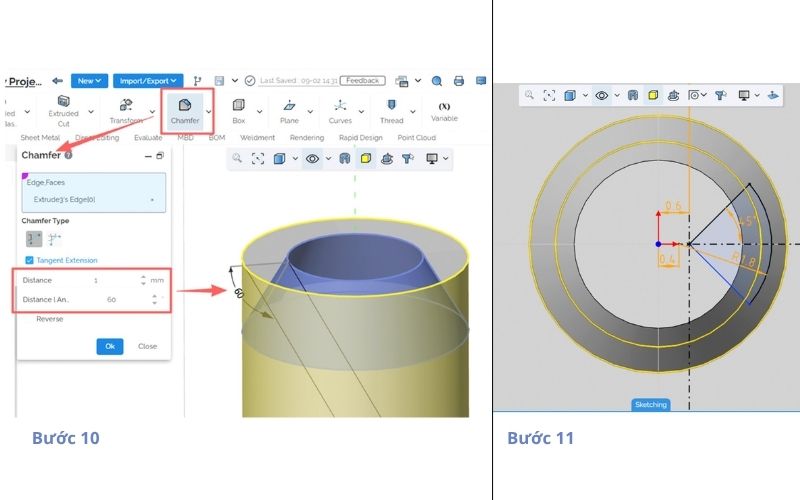
Step 10: Apply chamfer with a distance of 1 mm
Step 11: Sketch additional details on the top face
2.6 Create screwdriver tip grooves
Step 12: Draw the path on the Front plane
Step 13: Perform Swept Cut using the created profile and path

2.7 Pattern and finalize the screwdriver tip
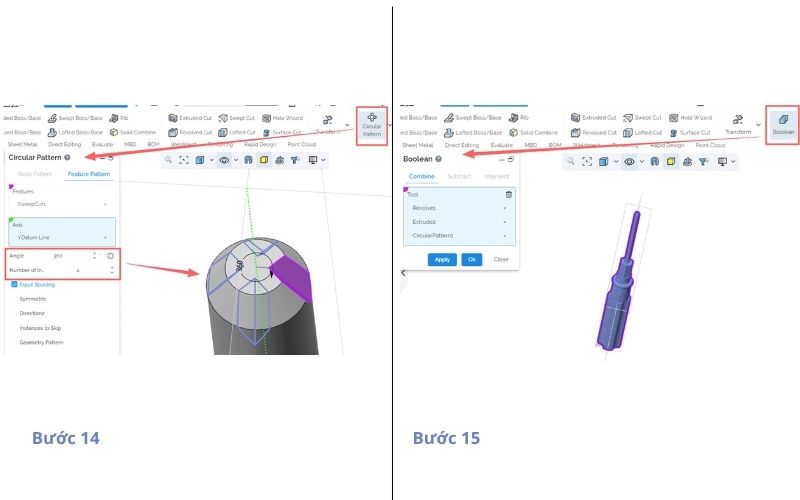
Step 14: Circular Pattern → 4 instances to create the Phillips head
Step 15: Boolean Combine the bodies
2.8 Finalize the 3D screwdriver design in CrownCAD
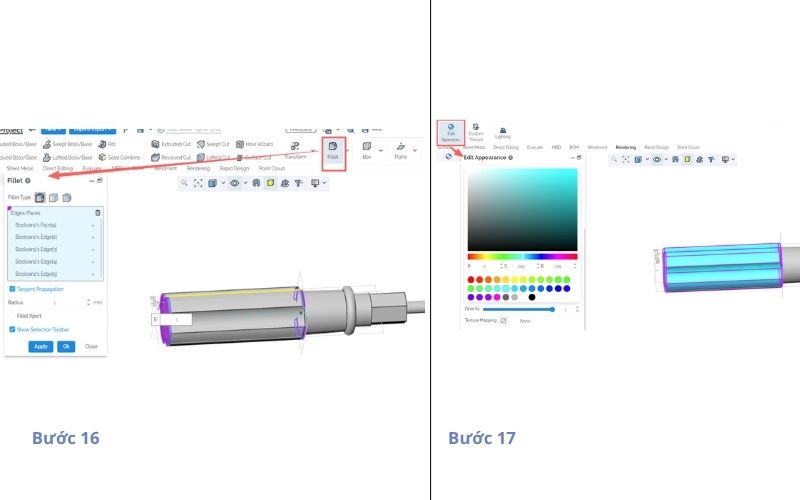
Step 16: Apply fillet to 5 edges with a radius of 1 mm
Step 17: Assign color (Edit Appearance) and complete the model
3. Optimization tips for 3D screwdriver design
Some tips when designing a Phillips screwdriver:
- Ensure ergonomic design for comfortable grip
- Select appropriate materials (plastic for handle, steel for shaft)
- Carefully check constraints and concentricity
- Optimize the design for machining or 3D printing
*Compiled and adapted from: CrownCAD
3D screwdriver design not only helps you improve your CAD skills but also opens up opportunities in product design and manufacturing. With CrownCAD, you can create precise, intuitive models ready for real-world production. If your business is looking for design solutions and R&D process optimization, SDE Tech is ready to support you.
- Website: sde.vn
- Email: sales@sde.vn
- Hotline/Zalo: 085 256 2615 – 0909 107 719