Tiếng Việt
 日本語
日本語 한국어
한국어
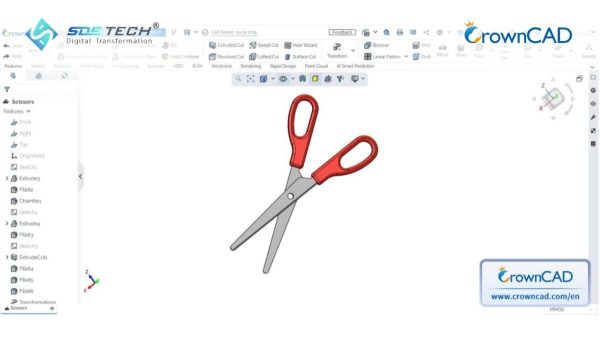
Scissors are an essential everyday tool, used for everything from opening packages to cutting paper for crafts. But have you ever wondered how to transform this familiar object into an accurate 3D model in CAD software? In this article, SDE TECH will guide you through the process of designing a 3D scissors model in CrownCAD. From the very first sketches to the final assembled product, we’ll walk through each step together.
Steps to Model 3D Scissors in CrownCAD
To get started, log in to your CrownCAD account directly from your web browser. Since this is a cloud-based solution, no installation is required—you can start practicing on any computer right away.
Độ khó: ★★☆☆☆ (Beginner-friendly)
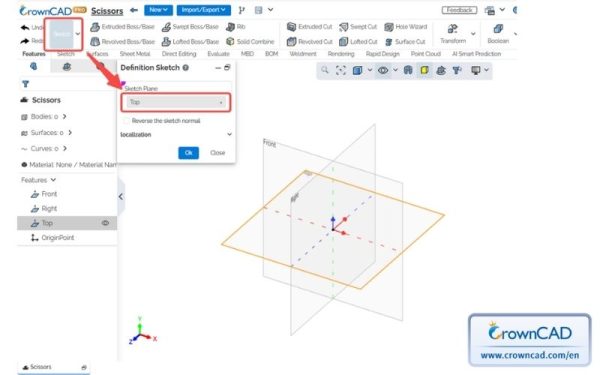
Step 1: Create a New Document and Start a Sketch
Create a new Part document. Click the Sketch command and select the Top plane as the sketching plane in CrownCAD.
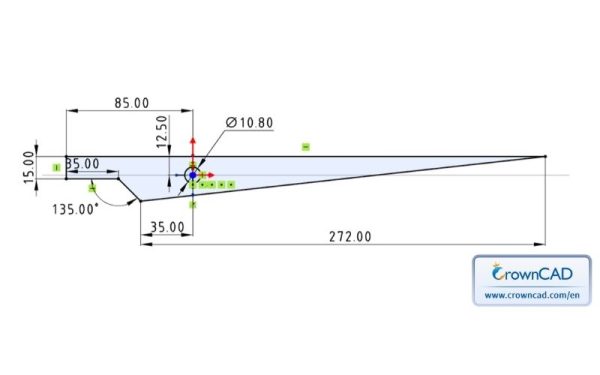
Step 2: Create the Initial Profile
Draw a sketch based on your reference model (note: ensure that the circle with a diameter of 10.8 mm is concentric with the coordinate system origin). After completing the sketch and fully defining all dimensions, exit the Sketch environment in CrownCAD.
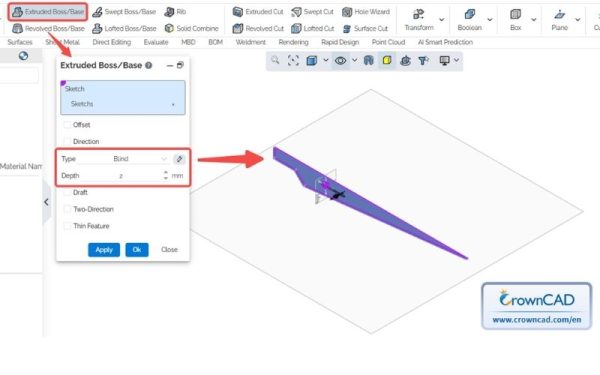
Step 3: Create the Base Solid for the Blade
Click the Extruded Boss/Base (Extrude) command, select the previously created Sketch1, set the extrusion depth to 2 mm, then click OK to generate the base solid in CrownCAD
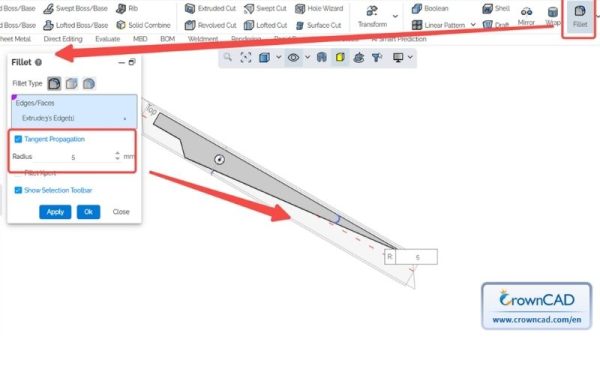
Step 4: Apply Fillet to the Blade Edge
Click the Fillet command, select the sharp edge at the tip of the blade, set the fillet radius to 5 mm, then click OK to smooth the edge in CrownCAD.
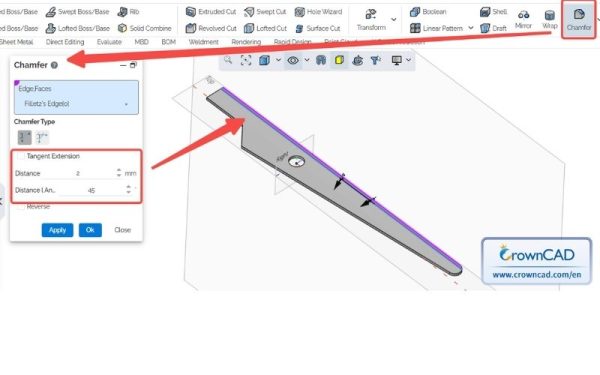
Step 5: Apply Chamfer to Create a Sharp Cutting Edge
Click the Chamfer command and select the cutting edge of the blade. Then choose the Angle-Distance Chamfer option, set the distance to 2 mm and the angle to 45°, and click OK to create a sharp edge in CrownCAD.
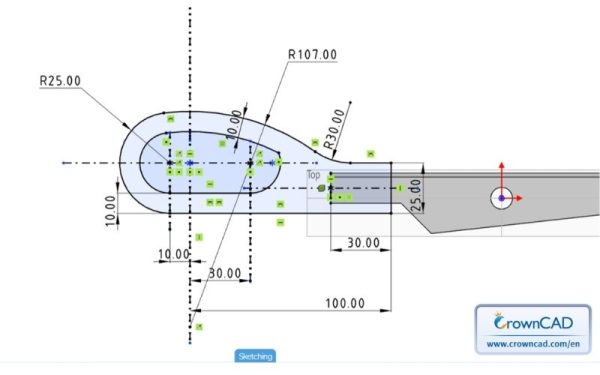
Step 6: Create the Handle Sketch
Select the Top plane again and create a new sketch (Sketch2). Draw the handle profile according to your reference dimensions in CrownCAD.
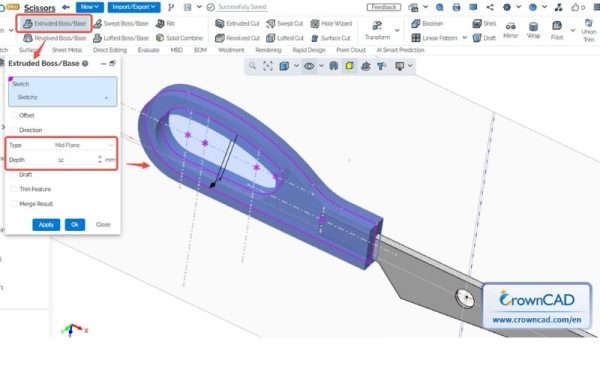
Step 7: Extrude the Handle
Click the Extruded Boss/Base command and select Sketch2. Under Type, choose Mid Plane (symmetric extrusion) and set the total distance to 12 mm, then click OK to create the handle in CrownCAD
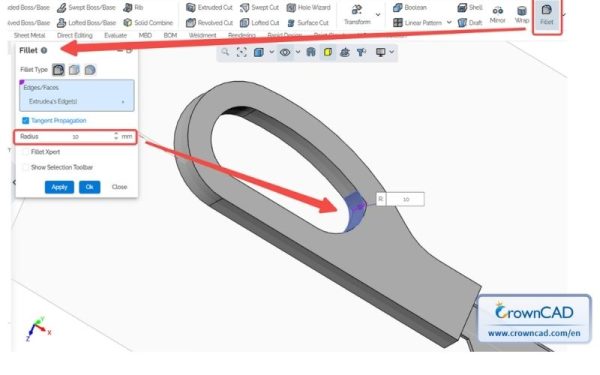
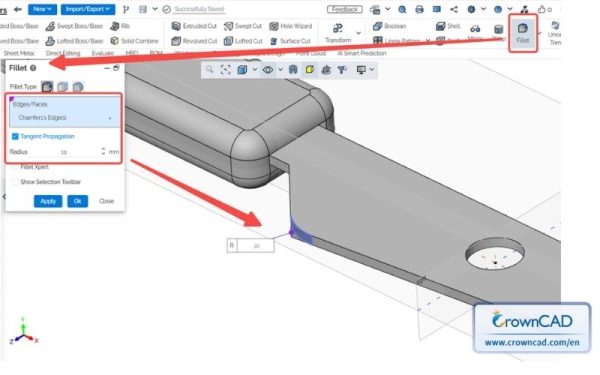
Step 8: Round the Transition Edges
Click the Fillet command and select the sharp edges at the transition between the blade and the handle. Set the fillet radius to 10 mm, then click OK to create a smooth transition in CrownCAD.
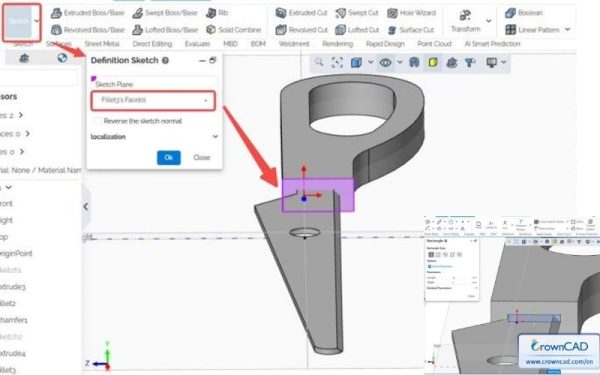
Step 9: Create the Trimming Profile for the Handle
Select the flat surface on the scissors body, then open a new sketch. Draw a rectangle that encloses the outer boundary of the handle profile in CrownCAD.
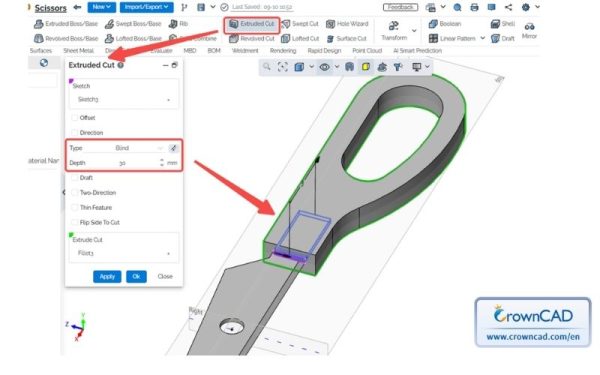
Step 10: Remove Excess Material
Click the Extruded Cut command and select Sketch3. Set the cut depth to 30 mm to remove the excess material created by the previous Fillet3 operation, then click OK to complete the cut in CrownCAD.
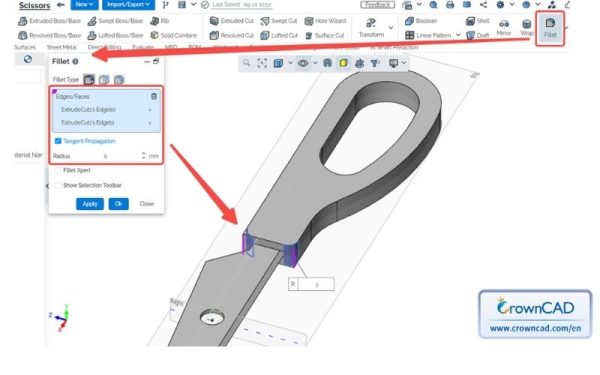
Step 11: Smooth the Handle Edges
Click the Fillet command and select the two sharp edges created in the previous step. Set the fillet radius to 5 mm, then click OK to smooth the handle edges in CrownCAD.
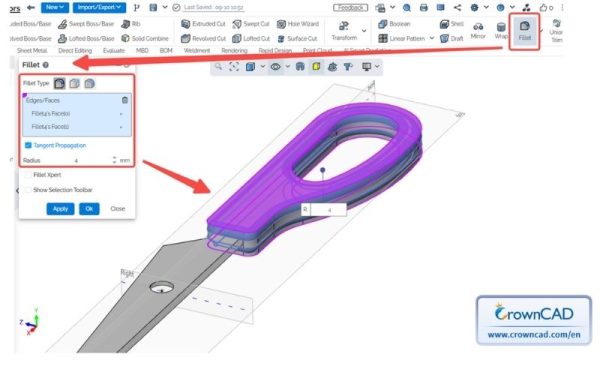
Step 12: Round the Grip Surfaces
Click the Fillet command and select the two large faces of the handle. Set the fillet radius to 4 mm, then click OK to smooth the grip surfaces in CrownCAD. You’ll notice that the handle becomes much more ergonomic and comfortable to hold.
Step 13: Finalize Small Fillet Details
Click the Fillet command and select the remaining small edge at the end of the handle. Set the fillet radius to 10 mm, then click OK to complete the detail refinement in CrownCAD. At this stage, you have completed one half of the scissors model.
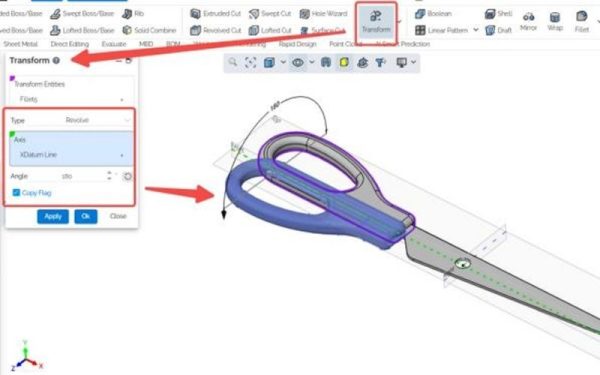
Step 14: Mirror to Create the Second Blade
Click the Transform command and select Fillet5 and Fillet6 (the entire half of the scissors). Set a 180° rotation around the X Datum Line, and make sure to enable the Copy Flag option to keep the original part. This will create the second half of the scissors in CrownCAD, completing the overall geometry of the model.
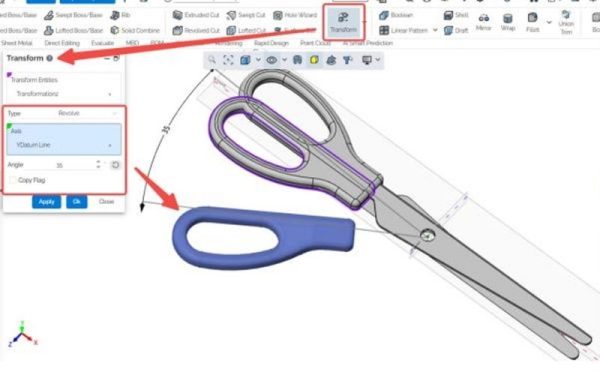
Step 15: Rotate the Bodies to Assembly Position
Click the Transform command again and select the two bodies created in Step 14. Set a 180° rotation around the Y Datum Line, and this time uncheck the Copy Flag option (since you are only repositioning, not duplicating). This step aligns the two halves correctly for assembly in CrownCAD.
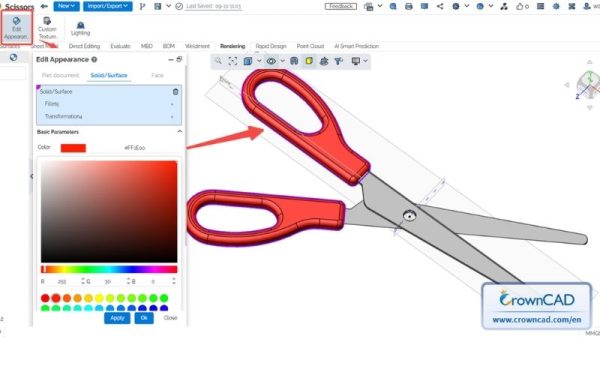
Step 16: Apply Colors to the Model
Click the Edit Appearance tool to assign colors to your model. You can customize the handle with plastic colors and apply metallic finishes to the blades based on your preference, making the model more visually realistic in CrownCAD.
That’s it! We’ve successfully completed a full 3D scissors model in CrownCAD using just a few fundamental features like Extrude and Fillet. As you can see, 3D design on a cloud-based platform is far from complicated or resource-intensive as many might think.
*Source: CrownCad – Linkedin
Ready to explore CrownCAD yourself? Don’t hesitate to contact SDE Tech today for guidance on setting up your account and discovering the full potential of this next-generation Cloud CAD solution!