Tiếng Việt
 日本語
日本語 한국어
한국어
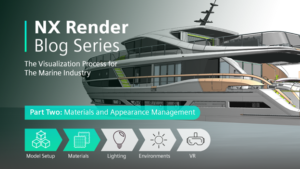
VISUALIZATION WORKFLOW FOR THE MARITIME INDUSTRY WITH NX DESIGN – PART 2
Introduction
The latest version of Siemens NX introduces the Appearance Management feature. While our previous blogs have highlighted the importance of applying materials to models, did you know the significance of managing visualization data to create a well-defined, comprehensive digital twin? If not, Part 2 of the maritime series will guide you through an effective visualization workflow in Siemens NX, with insights from visualization expert Gavin McCambridge, focusing on applying materials to models using Appearance Management.
Key to Impressive Looking Materials
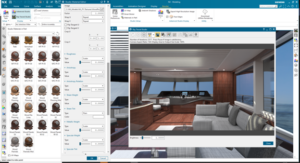
A key point emphasized in each blog so far is the personalized editing capabilities NX provides – making each model unique and each design distinct to the user. The new SVM library, available in NX 1953 and later, provides users with a complete library containing thousands of materials. From this ‘off the shelf’ library, users can also edit certain properties as needed. For example, consider a yacht model. The exterior color may need diffusion adjustments or reflectivity changes; these modifications are easily achieved using the new library.
Applying Custom Texture Schemes
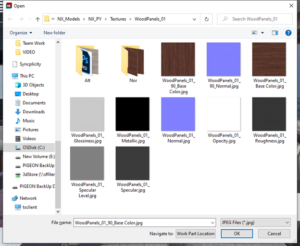
Building on the pre-built material library, NX offers two editing modes: a basic mode giving access to the above library as a strong starting point, and an advanced mode. The advanced mode provides buttons to add your own textures, such as a specific wood finish. NX thus allows access to basic materials, editing them as desired, and importing any textures created in external image editing software through these buttons.
TOP TIP
If you have your own textures, make sure your material is correctly assigned – it’s very simple.
“The two different editing methods in NX allow access and precise edits, all controlled by a float value, from 0 to 1 or a texture scheme. You can use either to operate.”
Finishing Small Details
When working on a large model, finishing small details is what distinguishes a good model from a great one. Consider how a brand asserts itself – how does it appear in web visuals and marketing materials?
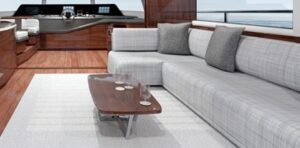
“At this stage, we focus on high-quality glossy or satin coatings. For example, yacht wood is carefully lacquered and reflective. Adding a varnish layer on top of actual wood materials creates a premium appearance.”
Attention is given to how these materials are finished to achieve the specific desired look. For example, in the yacht’s sky lounge, fabric textures were added to enhance depth and shadowing.
TOP TIP
As mentioned in Part 1, understanding the brand and the desired outcome from reference images is key. Ultimately, these images should represent your intended products or models. Take time in the model and workflow to create appropriate materials. Continuously check renderings and gather images from smaller render outputs to evaluate their appearance.
Rendering using NVIDIA RTX enterprise graphics can significantly accelerate the creative design process. NX Render supports RTX ray tracing and AI-accelerated denoising to provide faster renderings at critical times.
Benefits of Appearance Manager in Workflow
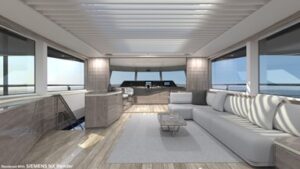
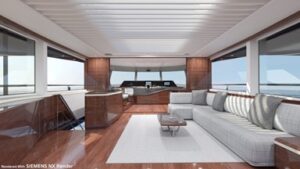
Integrating Appearance Manager into the visualization workflow makes these types of changes much easier. Appearance Manager uses “schemes,” meaning color and finish combinations, allowing multiple schemes to be set up within a model. For this yacht, Gavin used two different wood finishes. Setting up schemes allowed easy switching between dark and light wood, and adjusting materials on specific parts of the model.
“For example, the plush seating area can change along with the wood – all set up in Appearance Manager. You can configure as many schemes as desired.”
Setting up Schemes
Creating schemes isn’t difficult, but it’s important to remember how you want changes applied. For instance, if all wood materials should change simultaneously, set up the scheme, select all relevant parts, and add them to an assignment set. This ensures that when switching schemes, the correct materials update consistently.
This approach is also useful in reverse. For example, on the Sky Deck sofa, some parts may need to change with a specific scheme but not with another. Simply separate them and use a separate assignment set. Then verify that all materials update correctly.
“It really gives you flexibility to set up and reach the level of control you want. You can set up all schemes, flip between them, and share them with others using the model. You only need to send them the necessary files, and they can load the schemes themselves – a great way to showcase different results quickly.”
Advantages for Remote Work
The shift to remote work over the past two years has impacted everyone. This sharing feature is key to easily share files across locations, as long as both parties have a copy of the model dataset. This is especially helpful for review teams and saves valuable time for designers.
Source: Siemens
SDE TECHNOLOGY CO., LTD (SDE TECH) was established in 2014. By 2018, we became a Smart Expert Partner – a leading partner of Siemens Digital Industries Software in Southeast Asia – Pacific region for Siemens NX (Unigraphics NX), Simcenter, Solid Edge, Tecnomatix, and Teamcenter solutions.

For businesses and customers, please contact SDE TECH using the information below:
E-mail: sales@sde.vn – tech@sde.vn
Hotline: 0909 107 719
Website: www.sde.vn